I recently performed an overdue Ubuntu 24.04 upgrade on a few machines and as with past upgrades, I had to fix a few things after the fact.
As usual, I keep any backports of packages I make for myself in my noble PPA.
AppArmor fix for Brave Beta & Nightly
I had to modify the brave AppArmor profile in /etc/apparmor.d/brave in
order to enable proper sandboxing in Brave Beta &
Nightly.
Network problems
Surprisingly, .local resolution is still broken and I had to use my
work-around from the Ubuntu bionic
days.
I put the following in /etc/NetworkManager/conf.d/mdns.conf:
[connection]
connection.mdns=1
and in /etc/systemd/resolved.conf.d/local.conf:
[Resolve]
MulticastDNS=resolve
ssh agent problems
I also had to keep my ssh-agent fix from Ubuntu
focal
in ~/.bashrc:
eval $(systemctl --user show-environment | grep SSH_AUTH_SOCK)
export SSH_AUTH_SOCK
export SSH_ASKPASS=/usr/bin/ssh-askpass
I modified my existing bash alias:
alias ssh-add='ssh-add -c -t 14h'
to remove the -c option since ssh-add -c is currently broken, possibly
due to a missing DISPLAY when the agent
starts.
Similar to what I wrote for Ubuntu 18.04, here is how to setup an LXC container on Debian forky.
Installing the required packages
Start by installing the necessary packages on the host:
apt install lxc libvirt-clients debootstrap
Network setup
Ensure the veth kernel module is loaded by adding the following to
/etc/modules-load.d/lxc-local.conf:
veth
and then loading it manually for now:
modprobe veth
Enable IPv4 forwarding by putting this in /etc/sysctl.d/lxc-local.conf:
net.ipv4.ip_forward=1
and applying it:
sysctl -p /etc/sysctl.d/lxc-local.conf
Restart the LXC network bridge:
systemctl restart lxc-net.service
Ensure that container traffic is not blocked by the host firewall, for example by adding
the following to /etc/network/iptables.up.rules:
-A FORWARD -d 10.0.3.0/24 -m conntrack --ctstate RELATED,ESTABLISHED -j ACCEPT
-A FORWARD -s 10.0.3.0/24 -j ACCEPT
-A INPUT -d 224.0.0.251 -s 10.0.3.1 -j ACCEPT
-A INPUT -d 239.255.255.250 -s 10.0.3.1 -j ACCEPT
-A INPUT -d 10.0.3.255 -s 10.0.3.1 -j ACCEPT
-A INPUT -d 10.0.3.1 -s 10.0.3.0/24 -j ACCEPT
and applying the rules:
iptables-apply
Creating a container
To see all available images, run:
lxc-create -n foo --template=download -- --list
and then create a Debian forky container using:
lxc-create -n forky -t download -- -d debian -r forky -a amd64
Start and stop the container like this:
lxc-start -n forky
lxc-stop -n forky
Connecting to the container
Attach to the running container's console:
lxc-attach -n forky
Inside the container, you can change the root password by typing:
passwd
and install some essential packages:
apt install openssh-server vim
To find the container's IP address (for example, so that you can ssh to it from the host):
lxc-ls --fancy
I started learning Go this year. First, I picked a Perl project I wanted to rewrite, got a good book and ignored AI tools since I thought they would do nothing but interfere with learning. Eventually though, I decided to experiment a bit and ended up finding a few ways to use AI assistants effectively even when learning something new.
Searching more efficiently
The first use case that worked for me was search. Instead of searching on a traditional search engine and then ending up on Stack Overflow, I could get the answer I was looking for directly in an AI side-window in my editor. Of course, that's bad news for Stack Overflow.
I was however skeptical from the beginning since LLMs make mistakes, sometimes they making up function signatures or APIs that don't exist. Therefore I got into the habit of going to the official standard library documentation to double-check suggestions. For example, if the LLM suggests using strings.SplitN, I verify the function signature and behaviour carefully before using it. Basically, "don't trust and do verify."
I stuck to the standard library in my project, but if an LLM recommends third-party dependencies for you, make sure they exist and that Socket doesn't flag them as malicious. Research has found that 5-20% of packages suggested by LLMs don't actually exist, making this a real attack vector (dubbed "slopsquatting").
Autocomplete is too distracting
A step I took early on was to disable AI autocomplete in my editor. When learning a new language, you need to develop muscle memory for the syntax. Also, Go is no Java. There's not that much boilerplate to write in general.
I found it quite distracting to see some almost correct code replace my thinking about the next step. I can see how one could go faster with these suggestions, but being a developer is not just about cranking out lines of code as fast as possible, it's also about constantly learning new things (and retaining them).
Asking about idiomatic code
One of the most useful prompts when learning a new language is "Is this the most idiomatic way to do this in Go?". Large language models are good at recognizing patterns and can point out when you're writing code that works but doesn't follow the conventions of the language. This is especially valuable early on when you don't yet have a feel for what "good" code looks like in that language.
It's usually pretty easy (at least for an experience developer) to tell when the LLM suggestion is actually counter productive or wrong. If it increases complexity or is harder to read/decode, it's probably not a good idea to do it.
Reviews
One way a new dev gets better is through code review. If you have access to a friend who's an expert in the language you're learning, then you can definitely gain a lot by asking for feedback on your code.
If you don't have access to such a valuable resource, or as a first step before you consult your friend, I found that AI-assisted code reviews can be useful:
- Get the model to write the review prompt for you. Describe what you want reviewed and let it generate a detailed prompt.
- Feed that prompt to multiple models. They each have different answers and will detect different problems.
- Be prepared to ignore 50% of what they recommend. Some suggestions will be stylistic preferences, others will be wrong, or irrelevant.
The value is in the other 50%: the suggestions that make you think about your code differently or catch genuine problems.
Similarly for security reviews:
- A lot of what they flag will need to be ignored (false positives, or things that don't apply to your threat model).
- Some of it may highlight areas for improvement that you hadn't considered.
- Occasionally, they will point out real vulnerabilities.
But always keep in mind that AI chatbots are trained to be people-pleasers and often feel the need to suggest something when nothing was needed
An unexpected benefit
One side effect of using AI assistants was that having them write the scaffolding for unit tests motivated me to increase my code coverage. Trimming unnecessary test cases and adding missing ones is pretty quick when the grunt work is already done, and I ended up testing more of my code (being a personal project written in my own time) than I might have otherwise.
Learning
In the end, I continue to believe in the value of learning from quality books (I find reading paper-based most effective). In addition, I like to create Anki questions for common mistakes or things I find I have to look up often. Remembering something will always be faster than asking an AI tool.
So my experience this year tells me that LLMs can supplement traditional time-tested learning techniques, but I don't believe it obsoletes them.
P.S. I experimented with getting an LLM to ghost-write this post for me from an outline (+ a detailed style guide) and I ended up having to rewrite at least 75% of it. It was largely a waste of time.
The recent Turris OS update from 7.2.3 to 9.0.0 took down my WiFi entirely. The wired network still works fine, but wireless is completely broken.
Factory reset
It turns out the Omnia has an extensive (and fast) factory reset / recovery mode via the hardware reset button.
Unfortunately, the factory image didn't work for me, possibly because I don't use the stock WiFi radios anymore.
Rolling back with schnapps
Thanks to the fact that the Omnia uses a btrfs root filesystem, and the liberal use of snapshots around updates, I was able to rollback to the pre-9.0.0 state.
First, I connected to the router using ssh:
ssh root@192.168.1.1
Then I listed the available snapshots:
$ schnapps list
# | Type      | Size        | Date                        | Description
------+-----------+-------------+-----------------------------+------------------------------------
  500 | post      |    15.98MiB | 2025-08-09 11:27:48 -0700   | Automatic post-update snapshot (TurrisOS 7.2.2 - hbs)
  506 | pre       |    17.92MiB | 2025-09-12 03:44:32 -0700   | Automatic pre-update snapshot (TurrisOS 7.2.2 - hbs)
  507 | post      |    17.88MiB | 2025-09-12 03:45:14 -0700   | Automatic post-update snapshot (TurrisOS 7.2.3 - hbs)
  515 | time      |    20.03MiB | 2025-11-02 01:05:01 -0700   | Snapshot created by cron
  516 | time      |    20.05MiB | 2025-11-09 01:05:01 -0800   | Snapshot created by cron
  517 | time      |    20.29MiB | 2025-11-16 01:05:00 -0800   | Snapshot created by cron
  518 | time      |    20.64MiB | 2025-11-23 01:05:01 -0800   | Snapshot created by cron
  519 | time      |    20.83MiB | 2025-11-30 01:05:00 -0800   | Snapshot created by cron
  520 | pre       |    87.91MiB | 2025-11-30 07:41:10 -0800   | Automatic pre-update snapshot (TurrisOS 7.2.3 - hbs)
  521 | post      |   196.32MiB | 2025-11-30 07:48:11 -0800   | Automatic post-update snapshot (TurrisOS 9.0.0 - hbs)
  523 | pre       |     4.44MiB | 2025-11-30 20:47:31 -0800   | Automatic pre-update snapshot
  524 | post      |   224.00KiB | 2025-11-30 20:47:43 -0800   | Automatic post-update snapshot
  525 | rollback  |   224.00KiB | 2025-12-01 04:56:32 +0000   | Rollback to snapshot factory
  526 | pre       |     4.44MiB | 2025-11-30 21:04:19 -0800   | Automatic pre-update snapshot
  527 | post      |   272.00KiB | 2025-11-30 21:04:31 -0800   | Automatic post-update snapshot
  528 | rollback  |   272.00KiB | 2025-12-01 05:13:38 +0000   | Rollback to snapshot factory
  529 | pre       |     4.52MiB | 2025-11-30 21:28:44 -0800   | Automatic pre-update snapshot
  530 | single    |   208.00KiB |                             |
  531 | rollback  |   224.00KiB | 2025-12-01 05:29:47 +0000   | Rollback to snapshot factory
Finally, I rolled back to the exact state I was on before the 9.0.0 update:
$ schnapps rollback 520
Current state saved as snapshot number 532
Rolled back to snapshot 520
Full wipe
As an aside, it turns out that the factory reset functionality is implemented as a brtfs rollback to a special factory snapshot. This is why is so fast, but it also means that doing a simple factory reset doesn't wipe the data on your router. If you are planning to sell your device or otherwise dispose of it, you also need to delete all btrfs snapshots
Conclusion
While this update was very disappointing, especially since it's never happened before with major updates on Turris OS, it made me discover just how great the recovery tools are. It would be pretty tricky to fully brick one of these devices.
Ignoring SMS, which is vulnerable to SIM-swapping attacks, TOTP (Time-based One-Time Passwords) is probably the most popular second factor authentication method at the moment. While reviewing a pull request adding support for TOTP, I decided to investigate the current state of authenticators in 2025 with regards to their support for the various security parameters.
A previous analysis from 2019 found that many popular authenticators were happy to accept parameters they didn't actually support and then generate the wrong codes. At the time, a service wanting to offer TOTP to its users had to stick to the default security parameters or face major interoperability issues with common authenticator clients. Has the landscape changed or are we still stuck with security decisions made 15 years ago?
As an aside: yes, everybody is linking to a wiki page for an archived Google repo because there is no formal spec for the URI format.
Test results
I tested a number of Android authenticators against the oathtool client:
/usr/bin/oathtool --totp=SHA1 --base32 JVRWCZDTMVZWK5BAMJSSAZLOMVZGK5TJMVXGIZLDN5SGKZBAOVZI
/usr/bin/oathtool --totp=SHA256 --base32 JVRWCZDTMVZWK5BAMJSSAZLOMVZGK5TJMVXGIZLDN5SGKZBAOVZI
1Password:
- SHA1 (52 chars): yes
- SHA256: not available
- SHA1 (32 chars): yes
- SHA1 (52 chars): yes
- SHA256: yes
Authy (Twillio):
- SHA1 (32 chars): yes
- SHA1 (52 chars): yes
- SHA256: no (treats it as SHA1)
- Note: they also pick random logos to attach to your brand.
Bitwarden Authenticator:
- SHA1 (32 chars): yes
- SHA1 (52 chars): yes
- SHA256: yes
Duo Security:
- SHA1 (32 chars): yes
- SHA1 (52 chars): yes
- SHA256: no (treats it as SHA1)
- SHA1 (32 chars): yes
- SHA1 (52 chars): yes
- SHA256: yes
Google Authenticator:
- SHA1 (32 chars): yes
- SHA1 (52 chars): yes
- SHA256: yes
LastPass Authenticator:
- SHA1 (32 chars): yes
- SHA1 (52 chars): yes
- SHA256: yes
Microsoft Authenticator:
- SHA1 (32 chars): yes
- SHA1 (52 chars): yes
- SHA256: no (treats it as SHA1)
- SHA1 (32 chars): yes
- SHA1 (52 chars): yes
- SHA256: yes
I also tested the infamous Google Authenticator on iOS:
otpauth://totp/francois+1%40brave.com?secret=JVRWCZDTMVZWK5BAMJSSAZLOMVZGK5TJ&issuer=Brave%20Account&algorithm=SHA1&image=https://account.brave.com/images/email/brave-41x40.png
otpauth://totp/francois+1%40brave.com?secret=JVRWCZDTMVZWK5BAMJSSAZLOMVZGK5TJMVXGIZLDN5SGKZBAOVZI&issuer=Brave%20Account&algorithm=SHA1&image=https://account.brave.com/images/email/brave-41x40.png
- SHA1 (32 chars): yes
- SHA1 (52 chars): no (rejects it)
- SHA256 (32 chars): yes
Recommendations to site owners
So unfortunately, the 2019 recommendations still stand:
- Algorithm: SHA1
- Key size: 32 characters (equivalent to 20 bytes / 160 bits)
- Period: 30 seconds
- Digits: 6
You should also avoid putting the secret parameter
last in the URI to avoid breaking
some versions of Google Authenticator which parse these URIs incorrectly.
Other security and user experience considerations:
- Keep track of codes that are already used for as long they are valid since these codes are meant to be one-time credentials.
- Avoid storing the TOTP secret directly in plaintext inside the main app database and instead store it in some kind of secrets manager. Note: it cannot be hashed because the application needs the secret to generate the expected codes.
- Provide a recovery mechanism since users will lose their authenticators. This is often done through the use of one-time "scratch codes".
- Consider including in generated URIs two parameters introduced by the best Android client:
imageandcolor. Most clients will ignore them, but they also don't hurt.
Despite comments on my ikiwiki blog being fully moderated, spammers have been increasingly posting link spam comments on my blog. While I used to use the blogspam plugin, the underlying service was likely retired circa 2017 and its public repositories are all archived.
It turns out that there is a relatively simple way to drastically reduce the amount of spam submitted to the moderation queue: ban the datacentre IP addresses that spammers are using.
Looking up AS numbers
It all starts by looking at the IP address of a submitted comment:
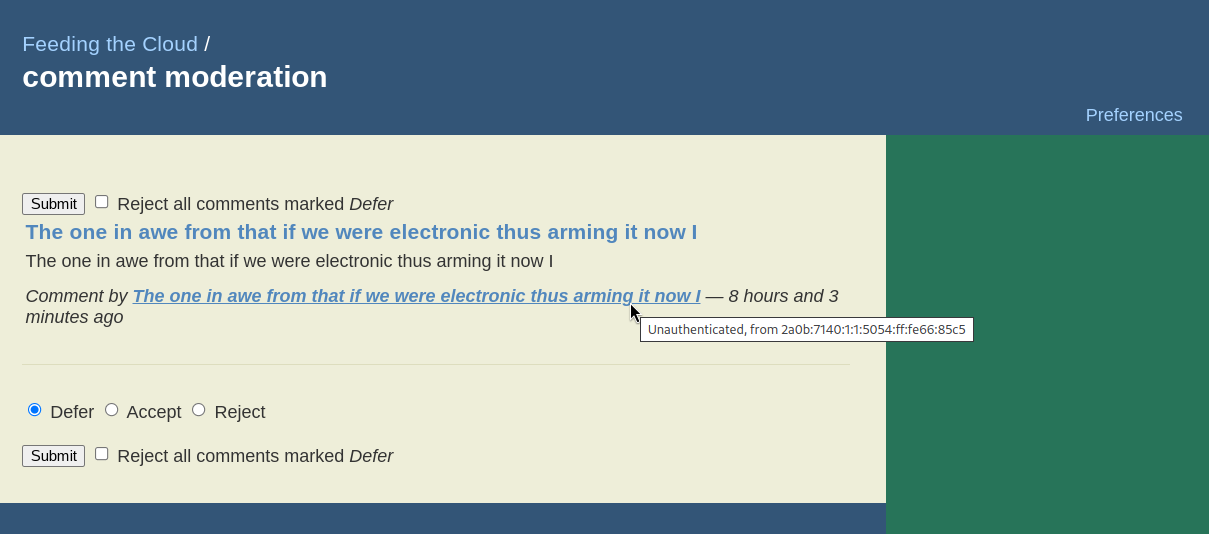
From there, we can look it up using whois:
$ whois -r 2a0b:7140:1:1:5054:ff:fe66:85c5

% This is the RIPE Database query service.
% The objects are in RPSL format.
%
% The RIPE Database is subject to Terms and Conditions.
% See https://docs.db.ripe.net/terms-conditions.html

% Note: this output has been filtered.
%       To receive output for a database update, use the "-B" flag.

% Information related to '2a0b:7140:1::/48'

% Abuse contact for '2a0b:7140:1::/48' is 'abuse@servinga.com'

inet6num:       2a0b:7140:1::/48
netname:        EE-SERVINGA-2022083002
descr:          servinga.com - Estonia
geoloc:         59.4424455 24.7442221
country:        EE
org:            ORG-SG262-RIPE
mnt-domains:    HANNASKE-MNT
admin-c:        CL8090-RIPE
tech-c:         CL8090-RIPE
status:         ASSIGNED
mnt-by:         MNT-SERVINGA
created:        2020-02-18T11:12:49Z
last-modified:  2024-12-04T12:07:26Z
source:         RIPE

% Information related to '2a0b:7140:1::/48AS207408'

route6:         2a0b:7140:1::/48
descr:          servinga.com - Estonia
origin:         AS207408
mnt-by:         MNT-SERVINGA
created:        2020-02-18T11:18:11Z
last-modified:  2024-12-11T23:09:19Z
source:         RIPE

% This query was served by the RIPE Database Query Service version 1.114 (SHETLAND)
The important bit here is this line:
origin: AS207408
which referts to Autonomous System 207408, owned by a hosting company in Germany called Servinga.
Alternatively, you can use this WHOIS server with much better output:
$ whois -h whois.cymru.com -v 2a0b:7140:1:1:5054:ff:fe66:85c5
AS      | IP                                       | BGP Prefix          | CC | Registry | Allocated  | AS Name
207408  | 2a0b:7140:1:1:5054:ff:fe66:85c5          | 2a0b:7140:1::/48    | DE | ripencc  | 2017-07-11 | SERVINGA-EE, DE
Looking up IP blocks
Autonomous Systems are essentially organizations to which IPv4 and IPv6 blocks have been allocated.
These allocations can be looked up easily on the command line either using a third-party service:
$ curl -sL https://ip.guide/as207408 | jq .routes.v4 >> servinga
$ curl -sL https://ip.guide/as207408 | jq .routes.v6 >> servinga
or a local database downloaded from IPtoASN.
This is what I ended up with in the case of Servinga:
[
  "45.11.183.0/24",
  "80.77.25.0/24",
  "194.76.227.0/24"
]
[
  "2a0b:7140:1::/48"
]
Preventing comment submission
While I do want to eliminate this source of spam, I don't want to block these datacentre IP addresses outright since legitimate users could be using these servers as VPN endpoints or crawlers.
I therefore added the following to my Apache config to restrict the CGI endpoint (used only for write operations such as commenting):
<Location /blog.cgi>
        Include /etc/apache2/spammers.include
        Options +ExecCGI
        AddHandler cgi-script .cgi
</Location>
and then put the following in /etc/apache2/spammers.include:
<RequireAll>
    Require all granted

    # https://ipinfo.io/AS207408
    Require not ip 46.11.183.0/24
    Require not ip 80.77.25.0/24
    Require not ip 194.76.227.0/24
    Require not ip 2a0b:7140:1::/48
</RequireAll>
Finally, I can restart the website and commit my changes:
$ apache2ctl configtest && systemctl restart apache2.service
$ git commit -a -m "Ban all IP blocks from Servinga"
Future improvements
I will likely automate this process in the future, but at the moment my blog can go for a week without a single spam message (down from dozens every day). It's possible that I've already cut off the worst offenders.
I have published the list I am currently using.
While most podcasts are available on multiple platforms and either offer an RSS feed or have one that can be discovered, some are only available in the form of a YouTube channel. Thankfully, it's possible to both monitor them for new episodes (i.e. new videos), and time-shift the audio for later offline listening.
Subscribing to a channel via RSS is possible thanks to the built-in, but not easily discoverable, RSS feeds. See these instructions for how to do it. As an example, the RSS feed for the official Government of BC channel is https://www.youtube.com/feeds/videos.xml?channel_id=UC6n9tFQOVepHP3TIeYXnhSA.
When it comes to downloading the audio, the most reliable tool I have found is yt-dlp. Since the exact arguments needed to download just the audio as an MP3 are a bit of a mouthful, I wrote a wrapper script which also does a few extra things:
- cleans up the filename so that it can be stored on any filesystem
- adds ID3 tags so that MP3 players can have the metadata they need to display and group related podcast episodes together
If you find that script handy, you may also want to check out the script I have in the same GitHub repo to turn arbitrary video files into a podcast.
A GitHub gist is backed by a regular git repository, but it's not exposed explicitly via the user interface.
For example, this "secret" gist can be cloned using this command:
git clone https://gist.github.com/fmarier/b652bad2e759675e8650f3d3ee81ab08.git test
Within this test directory, the normal git commands can be used:
touch empty
git add empty
git commit -a -m "Nothing to see here"
A gist can contain multiple files just like normal repositories.
In order to push to this repo, add the following pushurl:
git remote set-url --push origin git@gist.github.com:b652bad2e759675e8650f3d3ee81ab08.git
before pushing using the regular command:
git push
Note that the GitHub history UI will not show you the normal commit details such as commit message and signatures.
If you want to access the latest version of a file contained within this gist, simply access https://gist.githubusercontent.com/fmarier/b652bad2e759675e8650f3d3ee81ab08/raw/readme.md.
Using NetworkManager and systemd-resolved together in Debian
bookworm does not work out of the box. The first sign of trouble was these constant
messages in my logs:
avahi-daemon[pid]: Host name conflict, retrying with hostname-2
Then I realized that CUPS printer discovery didn't work: my network printer could not be found. Since this discovery now relies on Multicast DNS, it would make sense that both problems are related to an incompatibility between NetworkManager and Avahi.
What didn't work
The first attempt I made at fixing this was to look for known bugs in Avahi. Neither of the work-arounds I found worked:
the one proposed in https://github.com/avahi/avahi/issues/117#issuecomment-1651475104:
  [publish]
  publish-aaaa-on-ipv4=no
  publish-a-on-ipv6=no
nor the one proposed in https://github.com/avahi/avahi/issues/117#issuecomment-442201162:
  [server]
  cache-entries-max=0
What worked
The real problem turned out to be the fact that NetworkManager turns on full
mDNS support in systemd-resolved which conflicts with the mDNS support in
avahi-daemon.
You can see this in the output of resolvectl status:
Global
       Protocols: -LLMNR +mDNS -DNSOverTLS DNSSEC=no/unsupported
resolv.conf mode: stub

Link 2 (enp6s0)
    Current Scopes: DNS mDNS/IPv4 mDNS/IPv6
         Protocols: +DefaultRoute -LLMNR +mDNS -DNSOverTLS
                    DNSSEC=no/unsupported
Current DNS Server: 192.168.1.1
       DNS Servers: 192.168.1.1
        DNS Domain: lan
which includes +mDNS for the main network adapter.
I initially thought that I could just uninstall avahi-daemon and rely on the
systemd-resolved mDNS stack, but it's not actually compatible with
CUPS.
The solution was to tell NetworkManager to set mDNS to resolve-only mode in
systemd-resolved by adding the following to
/etc/NetworkManager/conf.d/mdns.conf:
[connection]
connection.mdns=1
leaving /etc/avahi/avahi-daemon.conf to the default Debian configuration.
Verifying the configuration
After rebooting, resolvectl status now shows the following:
Global
       Protocols: -LLMNR +mDNS -DNSOverTLS DNSSEC=no/unsupported
resolv.conf mode: stub

Link 2 (enp6s0)
    Current Scopes: DNS mDNS/IPv4 mDNS/IPv6
         Protocols: +DefaultRoute -LLMNR mDNS=resolve -DNSOverTLS
                    DNSSEC=no/unsupported
Current DNS Server: 192.168.1.1
       DNS Servers: 192.168.1.1
        DNS Domain: lan
Avahi finally sees my printer (called hp in the output below):
$ avahi-browse -at | grep Printer
+ enp6s0 IPv6 hp @ myprintserver   Secure Internet Printer local
+ enp6s0 IPv4 hp @ myprintserver   Secure Internet Printer local
+ enp6s0 IPv6 hp @ myprintserver   Internet Printer        local
+ enp6s0 IPv4 hp @ myprintserver   Internet Printer        local
+ enp6s0 IPv6 hp @ myprintserver   UNIX Printer            local
+ enp6s0 IPv4 hp @ myprintserver   UNIX Printer            local
and so does CUPS:
$ sudo lpinfo --include-schemes dnssd -v
network dnssd://myprintserver%20%40%20hp._ipp._tcp.local/cups?uuid=d46942a2-b730-11ee-b05c-a75251a34287
Firewall rules
Since printer discovery in CUPS relies on mDNS, another thing to double-check is that the correct ports are open on the firewall.
This is what I have in /etc/network/iptables.up.rules:
# Allow mDNS for local service discovery
-A INPUT -d 100.64.0.0/10 -p udp --dport 5353 -j ACCEPT
-A INPUT -d 192.168.1.0/24 -p udp --dport 5353 -j ACCEPT
and in etc/network/ip6tables.up.rules:
# Allow mDNS for local service discovery
-A INPUT -d ff02::/16 -p udp --dport 5353 -j ACCEPT
I know that people rave about GMail's spam filtering, but it didn't work for me: I was seeing too many false positives. I personally prefer to see some false negatives (i.e. letting some spam through), but to reduce false positives as much as possible (and ideally have a way to tune this).
Here's the local SpamAssassin setup I have put together over many years. In addition to the parts I describe here, I also turn off greylisting on my email provider (KolabNow) because I don't want to have to wait for up to 10 minutes for a "2FA" email to go through.
This setup assumes that you download all of your emails to your local machine. I use fetchmail for this, though similar tools should work too.
Three tiers of emails
The main reason my setup works for me, despite my receiving hundreds of spam messages every day, is that I split incoming emails into three tiers via procmail:
- not spam: delivered to inbox
- likely spam: quarantined in a
soft_spam/folder - definitely spam: silently deleted
I only ever have to review the likely spam tier for false positives, which is on the order of 10-30 spam emails a day. I never even see the the hundreds that are silently deleted due to a very high score.
This is implemented based on a threshold in my .procmailrc:
# Use spamassassin to check for spam
:0fw: .spamassassin.lock
| /usr/bin/spamassassin

# Throw away messages with a score of > 12.0
:0
* ^X-Spam-Level: \*\*\*\*\*\*\*\*\*\*\*\*
/dev/null

:0:
* ^X-Spam-Status: Yes
$HOME/Mail/soft_spam/

# Deliver all other messages
:0:
${DEFAULT}
I also use the following ~/.muttrc configuration to easily report false
negatives/positives and examine my likely spam folder via a shortcut in
mutt:
unignore X-Spam-Level
unignore X-Spam-Status

macro index S "c=soft_spam/\n" "Switch to soft_spam"

# Tell mutt about SpamAssassin headers so that I can sort by spam score
spam "X-Spam-Status: (Yes|No), (hits|score)=(-?[0-9]+\.[0-9])" "%3"
folder-hook =soft_spam 'push ol'
folder-hook =spam 'push ou'

# <Esc>d = de-register as non-spam, register as spam, move to spam folder.
macro index \ed "<enter-command>unset wait_key\n<pipe-entry>spamassassin -r\n<enter-command>set wait_key\n<save-message>=spam\n" "report the message as spam"

# <Esc>u = unregister as spam, register as non-spam, move to inbox folder.
macro index \eu "<enter-command>unset wait_key\n<pipe-entry>spamassassin -k\n<enter-command>set wait_key\n<save-message>=inbox\n" "correct the false positive (this is not spam)"
Custom SpamAssassin rules
In addition to the default ruleset that comes with SpamAssassin, I've also accrued a number of custom rules over the years.
The first set comes from the (now defunct) SpamAssassin Rules
Emporium.
The second set is the one that backs bugs.debian.org and
lists.debian.org.
Note this second one includes archived copies of some of the SARE rules and
so I only use some of the rules in the common/ directory.
Finally, I wrote a few custom rules of my own based on specific kinds of emails I have seen slip through the cracks. I haven't written any of those in a long time and I suspect some of my rules are now obsolete. You may want to do your own testing before you copy these outright.
In addition to rules to match more spam, I've also written a ruleset to remove false positives in French emails coming from many of the above custom rules. I also wrote a rule to get a bonus to any email that comes with a patch:
describe FM_PATCH   Includes a patch
body FM_PATCH   /\bdiff -pruN\b/
score FM_PATCH  -1.0
since it's not very common in spam emails 
SpamAssassin settings
When it comes to my system-wide SpamAssassin configuration in
/etc/spamassassin/, I enable the following plugins:
loadplugin Mail::SpamAssassin::Plugin::AntiVirus
loadplugin Mail::SpamAssassin::Plugin::AskDNS
loadplugin Mail::SpamAssassin::Plugin::ASN
loadplugin Mail::SpamAssassin::Plugin::AutoLearnThreshold
loadplugin Mail::SpamAssassin::Plugin::Bayes
loadplugin Mail::SpamAssassin::Plugin::BodyEval
loadplugin Mail::SpamAssassin::Plugin::Check
loadplugin Mail::SpamAssassin::Plugin::DKIM
loadplugin Mail::SpamAssassin::Plugin::DNSEval
loadplugin Mail::SpamAssassin::Plugin::FreeMail
loadplugin Mail::SpamAssassin::Plugin::FromNameSpoof
loadplugin Mail::SpamAssassin::Plugin::HashBL
loadplugin Mail::SpamAssassin::Plugin::HeaderEval
loadplugin Mail::SpamAssassin::Plugin::HTMLEval
loadplugin Mail::SpamAssassin::Plugin::HTTPSMismatch
loadplugin Mail::SpamAssassin::Plugin::ImageInfo
loadplugin Mail::SpamAssassin::Plugin::MIMEEval
loadplugin Mail::SpamAssassin::Plugin::MIMEHeader
loadplugin Mail::SpamAssassin::Plugin::OLEVBMacro
loadplugin Mail::SpamAssassin::Plugin::PDFInfo
loadplugin Mail::SpamAssassin::Plugin::Phishing
loadplugin Mail::SpamAssassin::Plugin::Pyzor
loadplugin Mail::SpamAssassin::Plugin::Razor2
loadplugin Mail::SpamAssassin::Plugin::RelayEval
loadplugin Mail::SpamAssassin::Plugin::ReplaceTags
loadplugin Mail::SpamAssassin::Plugin::Rule2XSBody
loadplugin Mail::SpamAssassin::Plugin::SpamCop
loadplugin Mail::SpamAssassin::Plugin::TextCat
loadplugin Mail::SpamAssassin::Plugin::TxRep
loadplugin Mail::SpamAssassin::Plugin::URIDetail
loadplugin Mail::SpamAssassin::Plugin::URIEval
loadplugin Mail::SpamAssassin::Plugin::VBounce
loadplugin Mail::SpamAssassin::Plugin::WelcomeListSubject
loadplugin Mail::SpamAssassin::Plugin::WLBLEval
Some of these require extra helper packages or Perl libraries to be
installed. See the comments in the relevant *.pre files or use this
command to install everything:
apt install spamassassin pyzor razor libencode-detect-perl liblog-log4perl-perl libgeoip-dev libmail-dkim-perl libarchive-zip-perl libio-string-perl libmail-dmarc-perl fuzzyocr
My ~/.spamassassin/user_prefs file contains the following configuration:
required_hits   5
ok_locales en fr

# Bayes options
score BAYES_00 -4.0
score BAYES_40 -0.5
score BAYES_60 1.0
score BAYES_80 2.7
score BAYES_95 4.0
score BAYES_99 6.0
bayes_auto_learn 1
bayes_ignore_header X-Miltered
bayes_ignore_header X-MIME-Autoconverted
bayes_ignore_header X-Evolution
bayes_ignore_header X-Virus-Scanned
bayes_ignore_header X-Forwarded-For
bayes_ignore_header X-Forwarded-By
bayes_ignore_header X-Scanned-By
bayes_ignore_header X-Spam-Level
bayes_ignore_header X-Spam-Status
as well as manual score reductions due to false positives, and manual score increases to help push certain types of spam emails over the 12.0 definitely spam threshold.
Finally, I have the FuzzyOCR
package installed since it has
occasionally flagged some spam that other tools had missed. It is a little
resource intensive though and so you may want to avoid this one if you are
filtering spam for other people.
As always, feel free to leave a comment if you do something else that works well and that's not included in my setup. This is a work-in-progress.